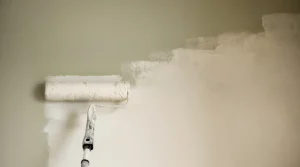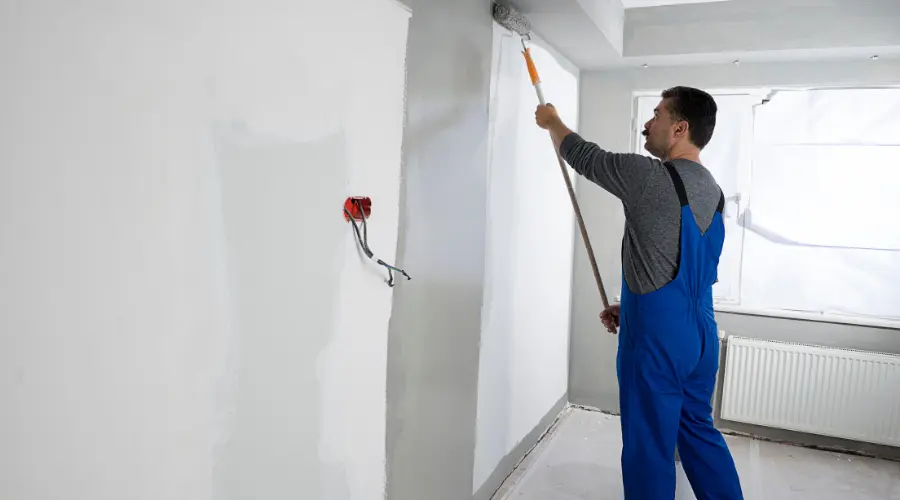
Giving your room a new coat of paint to transform it starts with more than just picking the perfect color. The secret to a long-lasting and professional-looking finish lies in meticulous surface preparation. It’s the foundation for a stunning transformation that stands the test of time.
Key Takeaway
Surface preparation is the cornerstone of a successful manual painting project. It ensures longevity, enhances paint adhesion, and creates a flawless finish. By following a structured six-step process and prioritizing cleaning and priming, you can transform any space into a stunning masterpiece while saving time and money in the long run.
Why Surface Preparation is Crucial Before Manual Painting
Surface preparation is often overlooked, but its importance cannot be overstated. It impacts every aspect of a painting project, from aesthetics to durability. Here’s why it matters:
- Ensuring Longevity
Surface preparation significantly extends the lifespan of your paint job. Properly prepping surfaces reduces the risk of peeling, cracking, or chipping, ensuring your work remains pristine for years.
- Achieving a Smooth Finish
Walls and surfaces may have imperfections like dents, bumps, or cracks. Without proper preparation, these flaws become more noticeable after painting. Smoothing out these irregularities ensures a seamless and flawless result.
- Enhanced Paint Adhesion
Prepped surfaces provide an optimal base for paint, allowing it to adhere evenly and effectively. This minimizes streaks and uneven patches, leaving a professional finish.
- Preventing Stains and Bleed-Through
Failing to prep surfaces can lead to unwanted stains or previous paint colors seeping through. Preparation creates a barrier that maintains the integrity of your chosen color.
- Economic Benefits
Investing time in preparation pays off. Well-prepped surfaces require less paint and reduce the need for frequent touch-ups or repaints, saving you money in the long term.
- Health and Safety Considerations
Unprepped surfaces may harbor harmful contaminants like mold, dust, or residues. Cleaning and preparing these areas ensure a safer environment and better air quality.
6-Step Guide to Surface Preparation for Manual Painting
Follow this step-by-step guide to ensure your surfaces are ready for a perfect paint job:
Step 1: Clear the Area
- Remove furniture and other obstructions from the room.
- Protect floors with drop cloths and cover edges or trims with painter’s tape.
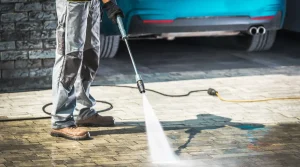
Step 2: Clean the Surface
- Use a mix of water and mild detergent to remove dirt, grease, and grime.
- For stubborn stains, apply specialized cleaners. Ensure surfaces are dry before proceeding.
Step 3: Repair Imperfections
- Identify holes, cracks, or dents and fill them using putty or filler.
- Sand the area when it has dried to create a smooth finish.
Step 4: Sand the Surface
- Sanding creates a slightly rough texture that helps the paint adhere better.
- Use fine-grit sandpaper for smoother areas and coarse-grit for rougher spots.
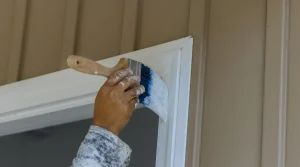
Step 5: Apply Primer
- Priming creates a uniform base, enhances adhesion, and prevents excessive paint absorption.
- Choose a primer suited to your surface type (e.g., wood, metal, or drywall).
Step 6: Mask and Protect
- Use painter’s tape to mask areas not intended for painting.
- Protect non-paintable surfaces with drop cloths or plastic sheets.
Cleaning and Priming: The Dynamic Duo of Preparation
- Thorough Cleaning
- Contaminants like grease and dirt can hinder paint adhesion. Cleaning ensures a flawless and long-lasting finish.
- Importance of Priming
- A quality primer prevents the surface from absorbing too much paint, improving coverage and color vibrancy.
- Some primers also block stains and enhance durability, making them indispensable for achieving a polished result.
Common Questions About Manual Painting and Surface Preparation
Q: Can I skip surface preparation if my walls look clean?
- Skipping preparation can lead to poor adhesion, uneven finishes, and reduced longevity. Even seemingly clean walls can have dust or oils that impact the paint’s effectiveness.
Q: How do I choose the right primer for my surface?
- The type of primer depends on the surface material. For example, oil-based primers work well on wood, while water-based primers are ideal for drywall. Examine product labels or see a specialist for the best choice.
Q: Is sanding always necessary?
- While not mandatory for all projects, sanding improves adhesion and smoothens imperfections, ensuring a better outcome. Glossy surfaces, in particular, require sanding for optimal paint adherence.
Q: How long should I wait after cleaning before painting?
- Ensure surfaces are dehydrated before painting. Depending on the cleaning method and room conditions, this can take a few hours to overnight.
Q: Do I need to use painter’s tape if I’m experienced with a brush?
- Painter’s tape is recommended for clean, sharp lines and to protect areas you don’t want to be painted. Even experienced painters use tape for precision.
Q: What should I do if I find mold during preparation?
- Address mold issues with a specialized cleaner or a mix of bleach and water (1:3 ratio). Allow the area to dry completely before continuing with the prep process.
Conclusion
Surface preparation is the unsung hero of manual painting. By dedicating time to cleaning, repairing, sanding, and priming, you lay the foundation for a paint job that’s beautiful and durable. Whether you’re refreshing your home, office, or another space, remember that preparation is key to unlocking the full potential of your chosen colors.
Take the time to prep your surfaces and enjoy a smoother, more rewarding painting experience. After all, excellent results are built on great preparation!Transform your home with a fresh, vibrant look! At New City House Painter, we deliver top-quality painting services that elevate your home’s style while providing lasting protection against the elements. Let us turn your vision into reality!